20 Stunning Charcuterie Board: The Amazing Ultimate Guide
20 Stunning Charcuterie Board is an amazing way to elevate your entertaining game. Charcuterie boards are not just about food; they are a delightful spread that showcases creativity, flavor, and artful presentation. From fresh fruits and assorted cheeses to savory meats and crackers, a chic charcuterie board can be the centerpiece of any gathering. Whether you’re hosting a birthday party, a wedding, or a casual get-together, a stunning charcuterie board will surely impress your guests.
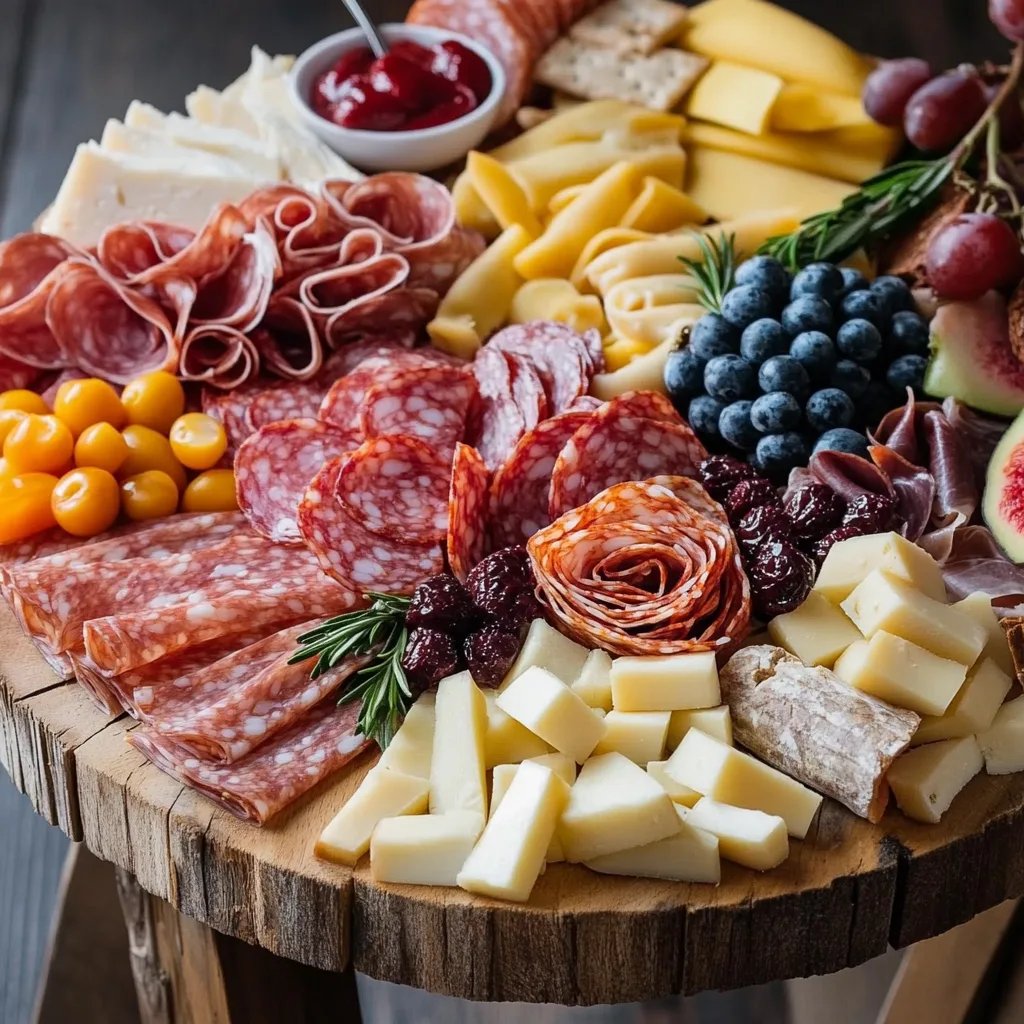
Charcuterie boards allow personal expression and creativity while offering a feast for the senses. The vibrant colors and textures create an appealing visual that intrigues the eyes and the palate. They can cater to various dietary preferences — including vegetarian, vegan, or gluten-free options. Sharing a charcuterie board fosters a sense of community, encouraging guests to explore and indulge in a diverse array of flavors together.
In this comprehensive guide, you will discover why you’ll love creating your own charcuterie boards. From preparation time and ingredient lists to step-by-step instructions and serving suggestions, this article aims to provide you with everything you need to craft the ultimate charcuterie board experience. Get ready to impress your friends and family with your newfound skills!
Why You’ll Love This Recipe
There are many reasons why you’ll fall in love with creating your own stunning charcuterie boards. Here are just a few:
1. Endless Customization: You can mix and match your favorite ingredients to suit your taste and dietary preferences.
2. Visual Appeal: A well-assembled charcuterie board is a feast for the eyes, making every event feel special.
3. Perfect for Any Occasion: Whether a simple family gathering or an elegant soirée, charcuterie boards fit right in.
4. Interactivity: Guests can explore the range of flavors, creating a fun and engaging atmosphere.
5. Balance of Flavors: Combining sweet, savory, crunchy, and creamy elements results in a wonderful tasting experience.
6. Quick Preparation: Most of the work involves arranging ingredients, making it easy to prepare.
These aspects highlight why the 20 Stunning Charcuterie Board is not just a meal but an experience worth sharing!
Preparation and Cooking Time
Creating a stunning charcuterie board can be done relatively quickly. Here’s a breakdown of the time you’ll require:
– Preparation Time: 30-60 minutes (depending on the complexity)
– Cooking Time: 0 minutes (as no cooking is typically required)
– Total Time: Approximately 30-60 minutes
This makes it an ideal option for last-minute gatherings or planned events.
Ingredients
Here’s a straightforward list of ingredients you might consider incorporating into your stunning charcuterie board. Feel free to select those that appeal to you!
– Assorted cheeses (cheddar, brie, gouda, goat cheese)
– Cured meats (salami, prosciutto, chorizo)
– Fresh fruits (grapes, figs, berries, apple slices)
– Dried fruits (apricots, cranberries, dates)
– Nuts (almonds, walnuts, pistachios)
– Crackers and breadsticks
– Olives and pickles
– Spreads (honey, mustard, hummus)
– Fresh herbs (rosemary, basil, mint for garnish)
Optional Ingredients
– Dark chocolate squares
– Vegetables (carrots, cucumbers, cherry tomatoes)
– Beet chips or pita chips
– flavored oils or vinegar for drizzling
These ingredients allow for multiple combinations, ensuring each charcuterie board has its unique flair.
Step-by-Step Instructions
Creating a stunning charcuterie board does not require extensive cooking knowledge, just attention to detail and design. Follow these simple steps:
1. Select Your Board: Choose a large cutting board, a wooden platter, or a marble slab for an elegant presentation.
2. Begin with Cheese: Start by placing your cheeses on the board. This acts as the anchor of your display. Alternate the types and shapes for visual interest.
3. Add Meats: Casually fold or roll your cured meats and position them near the cheeses, ensuring they are easy to reach.
4. Fill in the Gaps with Fresh and Dried Fruits: Place clusters of fresh fruits around the board, followed by dollops of dried fruits in empty spaces.
5. Incorporate Nuts: Place bowls or small piles of nuts strategically throughout the board for added crunch.
6. Arrange Crackers and Breadsticks: Create a section for crackers or breadsticks, either stacked neatly or placed in jars.
7. Incorporate Spreads: Add small bowls filled with spreads like honey or hummus, spaced evenly across the board for convenience.
8. Add Garnishes: Finally, sprinkle fresh herbs or edible flowers for an extra touch of elegance and color.
9. Adjust and Rearrange: Stand back and check the balance of colors and textures. Rearrange as necessary to achieve the desired look.
10. Serve: Place the completed charcuterie board on a table and invite your guests to indulge!
With these steps, you’ll create an incredible charcuterie board that showcases your personality and style!
How to Serve
Serving your stunning charcuterie board is just as important as creating it. Here are some tips to ensure your guests enjoy the experience:
1. Presentation Matters: Elevate the board on a stand or a brightly colored tablecloth to create visual interest.
2. Provide Utensils:Ensure you have cheese knives, forks, and small spoons for spreads to facilitate easy serving.
3. Pair with Beverages: Suggest drink pairings, like wine, beer, or cocktails, to complement the flavors of the board.
4. Encourage Exploration: Invite your guests to mix and match and create their combinations from the board to enhance engagement.
5. Consider Portions: Slice cheeses into bite-sized pieces and arrange meats in smaller servings to encourage sampling.
6. Offer Extras: Provide toothpicks or cocktail napkins for easy eating and to maintain cleanliness.
By following these serving tips, you will turn your charcuterie board into a charming focal point of your gathering. Each bite will not only taste amazing but also bring everyone together in appreciation of food and creativity. Enjoy creating and sharing your stunning charcuterie boards!
Additional Tips
– Use Fresh Ingredients: Fresh fruits and quality meats will enhance the flavors of your charcuterie board.
– Balance Your Flavors: Aim for a mix of sweet, savory, and tangy elements to delight your guests’ taste buds.
– Go Seasonal: Incorporate seasonal fruits and vegetables for a fresh touch and added visual appeal.
– Consider Dietary Restrictions: Be mindful of your guests’ dietary needs by including vegetarian or gluten-free options.
– Use Small Containers: Mini jars or bowls can elevate the presentation of spreads and dips, making it easier for guests to serve themselves.
– Garnish Strategically: Edible flowers or small herbs can add an elegant touch, enhancing both flavor and look.
– Arrange for Accessibility: Ensure that all items are easy to reach without crowding. This promotes a fluid serving experience.
Recipe Variation
Explore these creative variations to keep your charcuterie boards exciting and unique:
1. Mediterranean Style: Include hummus, feta cheese, marinated olives, and pita bread for a Middle Eastern flair.
2. Sweet Dessert Board: Swap savory ingredients for sweet treats, such as dark chocolate, pastries, assorted candies, and fruit jams.
3. Themed Boards: Create a seasonal board featuring autumnal ingredients like roasted pumpkin and spiced nuts, or a summer board with vibrant seasonal fruits.
4. Kid-Friendly Board: Incorporate peanut butter, jelly sandwiches cut into fun shapes, cheese sticks, and sweet fruits to cater to younger guests.
5. Vegan Board: Use plant-based cheeses, roasted vegetables, nuts, and dried fruits to create a vegan-friendly option that’s just as delicious.
Freezing and Storage
– Storage: Keep any leftovers in the refrigerator, ideally in airtight containers. They should last about 2-3 days.
– Freezing: While charcuterie boards are best enjoyed fresh, you can freeze certain items like dried fruits and nuts. Just be aware that cheeses may alter in texture after freezing.
Special Equipment
No special equipment is necessary, but a few tools can enhance your experience:
– Cutting Board or Serving Platter: Choose an aesthetically pleasing board to serve as the base for your charcuterie display.
– Small Bowls or Jars: Use these for spreads and dips to keep items organized and visually appealing.
– Cheese Knives: Having a variety of cheese knives can make it easier for guests to serve themselves.
– Tongs and Skewers: Use these for serving meats or fruits, making it hygienic and easy to grab.
Frequently Asked Questions
How far in advance can I prepare my charcuterie board?
You can prepare some components ahead of time. However, it’s best to assemble the board within a few hours of serving to maintain freshness.
What cheeses pair well together?
A variety of textures is key. Consider pairing soft cheeses (like brie) with hard cheeses (like cheddar) for a diverse taste experience.
What can I do if I run out of space?
Utilize vertical space by using small jars or stacking items creatively, or simply create a second board to spread out your offerings.
Can I include hot items?
Yes! Feel free to include baked items like stuffed mushrooms or baked brie if you want to elevate your charcuterie board.
What if I have leftovers?
Any remaining ingredients can be stored in airtight containers in the fridge for quick snacks or meals later.
Conclusion
Creating a stunning charcuterie board is not just about assembling food; it’s an art form that brings people together to enjoy a vibrant array of flavors and textures. Whether you opt for classic ingredients or experiment with unique combinations, your charcuterie board can be as simple or intricate as you desire. Embrace the creativity, enjoy the process, and watch as your guests indulge in this shared culinary experience. Remember, it’s about celebrating good food and great company!