Cronut Recipe: The Amazing Ultimate Guide to 7 Steps
Cronut Recipe is a delightful way to indulge in a unique and delicious pastry that blends the best of doughnuts and croissants. This incredible hybrid treat has taken the world by storm, offering layers of flaky pastry wrapped around sweet custard and topped with glaze. It’s not just a dessert; it’s a culinary experience that leaves a lasting impression.
At first bite, the Cronut reveals its crunchy exterior and soft, buttery layers. It’s an amazing fusion of textures that instantly captures your taste buds. Whether you enjoy it with a morning cup of coffee or as an afternoon snack, the Cronut is sure to become a favorite. This guide will walk you through everything you need to know to make this fantastic pastry at home, from the reasons to love this unique recipe to step-by-step instructions for perfecting it.
With a blend of rich buttery flavors and sweet fillings, making your Cronut at home is not only rewarding but also fun. You’ll impress your friends and family with this exceptional pastry that looks and tastes gourmet. Let’s dive into what makes the Cronut Recipe so special!
Why You’ll Love This Recipe
The Cronut Recipe presents a wonderful opportunity to experience pastry baking in a whole new way. Here are some reasons you’ll fall head over heels for this recipe:
1. Unique Flavor & Texture: The combination of flaky croissant layers and sweet doughnut flavors creates an irresistible taste experience.
2. Versatile Fillings: You can customize the filling, using anything from vanilla custard to chocolate ganache or fruit preserves.
3. Impressive Appearance: When you present your homemade Cronuts, guests will be in awe of your baking skills and artistry.
4. Fun to Make: The process of laminating dough and frying adds excitement to your baking adventure.
5. Perfect for Any Occasion: Whether it’s a brunch, birthday party, or special treat, these Cronuts fit any occasion perfectly.
6. Great for Sharing: These delicious pastries are easy to share, making them a superb option for gatherings.
With these fantastic qualities, you’ll soon understand why Cronuts are adored by so many!
Preparation and Cooking Time
Creating these delightful pastries will take some time and patience but is worth every minute. Here’s a breakdown of the preparation and cooking times you can expect:
– Preparation Time: 2 hours (includes resting time for dough)
– Cooking Time: 30 minutes (for frying and cooling)
– Total Time: Approximately 2 hours and 30 minutes
These times may vary depending on your kitchen habits, but this gives a reliable estimate to help you prepare.
Ingredients
– 2 cups all-purpose flour
– 1 cup pastry flour
– 1 tablespoon sugar
– 1 teaspoon salt
– 1 tablespoon instant yeast
– ½ cup whole milk
– 3 large eggs
– 1 cup unsalted butter (for laminating)
– 1 cup pastry cream or any desired filling
– Oil for frying
– Glaze (powdered sugar mixed with water or milk)
– Optional toppings (sprinkles, chocolate drizzle, etc.)
Step-by-Step Instructions
Making Cronuts may seem challenging, but if you follow these steps, you’ll create an incredible pastry:
1. Prepare the Dough: In a large bowl, combine all-purpose flour, pastry flour, sugar, salt, and instant yeast. Mix well.
2. Add Wet Ingredients: Gradually add warm milk and eggs to the dry mixture. Knead until a soft dough forms.
3. Initial Rest: Cover the dough with a clean cloth and let it rest in a warm place for about 1 hour, allowing it to double in size.
4. Prepare Butter Block: While resting, take the unsalted butter and place it between two pieces of parchment paper. Roll it out into a rectangle about ½ inch thick and refrigerate until firm.
5. Laminate the Dough: Roll the rested dough into a rectangle. Place the chilled butter block in the center, fold the dough over, and seal the edges. Roll out and fold again. Repeat this process twice for a total of three rolls.
6. Cut the Cronuts: Roll the dough to about ½ inch thick and use a doughnut cutter to cut out Cronut shapes. Make sure to cut a smaller hole in the center.
7. Fry the Cronuts: Heat oil in a deep pot to 360°F (182°C). Fry the Cronuts in batches until golden brown, about 2-3 minutes each side. Drain on paper towels.
Following these steps will lead you to the creation of beautifully flaky and delicious Cronuts!
How to Serve
Once you’ve created your Cronuts, here’s how to present them beautifully:
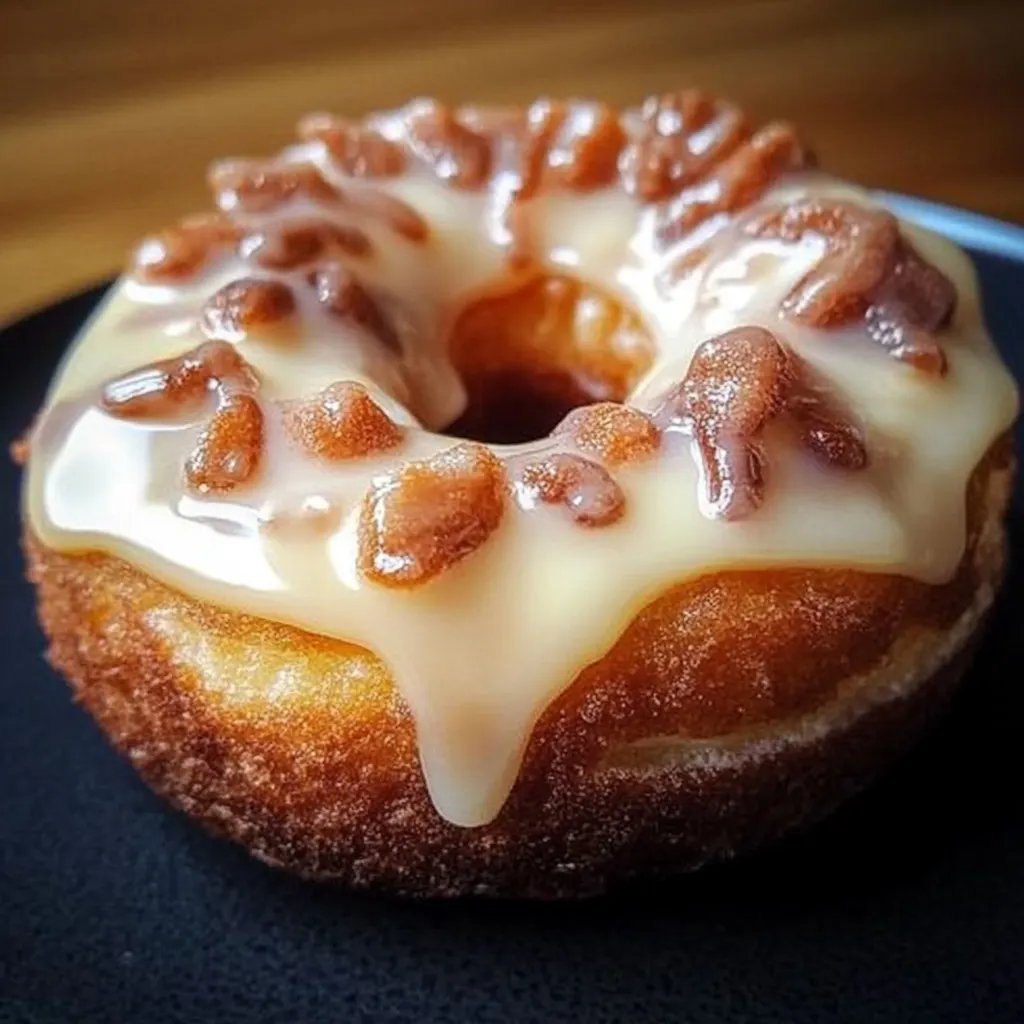
1. Glaze: Dip each Cronut in a sweet glaze while still warm for an extra touch of flavor.
2. Toppings: Add additional toppings like sprinkles, shredded coconut, or drizzled chocolate to enhance their appearance.
3. Plating: Use a cake stand to display your Cronuts. Arrange them attractively to draw attention.
4. Pairing: Serve with a side of fresh fruit, whipped cream, or a scoop of ice cream for a delightful dessert experience.
5. Sizing: Cut them into smaller pieces for a tasting platter so everyone can enjoy a piece without feeling too indulgent.
By thoughtfully considering how to serve these delicious Cronuts, you’ll ensure that your hard work pays off, and everyone will be raving about this amazing treat!
Now that you have the recipe details and serving suggestions, your journey into the world of Cronuts is ready to begin. Enjoy the process and the delightful results!
Additional Tips
– Use Quality Ingredients: The fresher your ingredients, the better your Cronuts will taste. Opt for high-quality butter, eggs, and milk.
– Monitor Frying Temperature: Use a thermometer to keep the oil at a steady 360°F (182°C). This will help achieve that perfect golden color and flaky texture.
– Let Cool Before Glazing: Allow your Cronuts to cool for a few minutes before glazing. This helps the glaze adhere better.
– Try Different Fillings: Don’t hesitate to experiment with various fillings. Think about adding lemon curd, salted caramel, or even peanut butter for exciting flavors.
Recipe Variation
Feel free to get creative! Here are some variations to try with your Cronut Recipe:
1. Savory Cronuts: Instead of sweet fillings, fill your Cronuts with ham and cheese or even a spicy jalapeño cream cheese.
2. Flavored Dough: Incorporate spices or citrus zest into the dough for added flavor. Consider adding vanilla extract or fresh orange zest.
3. Chocolate Cronut: Add cocoa powder to the dough for a chocolatey twist. Pair it with chocolate glaze and filling for double chocolate indulgence.
4. Gluten-Free Option: Substitute the all-purpose and pastry flour with a gluten-free flour blend for a tasty gluten-free treat.
Freezing and Storage
– Storage: Cronuts are best enjoyed fresh but can be stored in an airtight container at room temperature for 1-2 days.
– Freezing: If you want to freeze them, wrap each Cronut tightly in plastic wrap and place them in a freezer bag. They can be frozen for up to 3 months. Thaw in the refrigerator before enjoying, and consider reheating in the oven for a few minutes to restore crispness.
Special Equipment
To create these delightful Cronuts, here are some essential tools you will need:
– Rolling pin
– Doughnut cutter or cookie cutters
– Deep frying thermometer
– Mixing bowls
– Pastry brush (for glazing)
– Parchment paper
Frequently Asked Questions
Can I make Cronuts in advance?
While it’s best to serve them fresh, you can prepare the dough and fill it a day ahead. Fry them just before serving for the best texture.
How do I know when the oil is ready for frying?
You can test the oil by dropping a small piece of dough into it. If it sizzles and rises to the surface, the oil is ready.
What can I use instead of a doughnut cutter?
If you don’t have a doughnut cutter, you can use two different-sized round cookie cutters or even the rim of a glass for cutting out the shapes.
Are Cronuts vegan-friendly?
For a vegan version, substitute dairy ingredients with almond milk and use a vegan butter alternative. You can also replace eggs with flaxseed meal or applesauce.
Can I make Cronuts without frying?
Yes! If you prefer a healthier option, you can bake the Cronuts in the oven. Simply follow the shaping instructions and bake at 375°F (190°C) until golden brown.
Conclusion
The Cronut Recipe offers a fun and adventurous baking experience that is both rewarding and indulgent. With its unique texture and flavor profile, it’s a treat that has captured hearts and taste buds everywhere. By following the steps outlined in this guide, you can create impressive Cronuts that taste just as good as those from your favorite bakery. So roll up your sleeves, gather your ingredients, and get ready to enjoy this delightful culinary creation!