Easter Charcuterie Board: An Amazing Ultimate Guide to 10 Creative Ideas
Easter Charcuterie Board is an amazing way to celebrate the spring season. These boards not only provide a delightful array of flavors but also create a stunning centerpiece for your table. Full of vibrant colors and diverse textures, they offer an interactive dining experience that encourages sharing and conversation. Whether you’re hosting a large family gathering or enjoying a smaller celebration, an Easter-themed charcuterie board can captivate your guests’ attention and taste buds.
One of the most exciting aspects of creating an Easter Charcuterie Board is the freedom to customize it. You can incorporate seasonal ingredients, festive colors, and unique shapes that symbolize Easter, such as eggs and bunnies. Think about the array of deli meats, cheeses, fruits, nuts, and various dips that can be included. Whatever your style, an Easter Charcuterie Board lets you express your creativity while serving delicious food.
If you’re new to charcuterie boards or looking for fresh ideas to elevate your existing boards, this guide will provide you with everything you need to know. We’ll discuss why these boards are a must-have for your Easter celebration, how to prepare them effectively, and the essential ingredients to include. Additionally, you’ll find step-by-step instructions for assembling your board, ensuring it looks as good as it tastes. Let’s embark on this delicious journey and learn how to make an incredible Easter Charcuterie Board that will impress everyone!
Why You’ll Love This Recipe
An Easter Charcuterie Board is a fantastic way to bring people together, celebrating the joy and renewal spring brings. Here are several reasons why this board will become a beloved part of your holiday traditions:
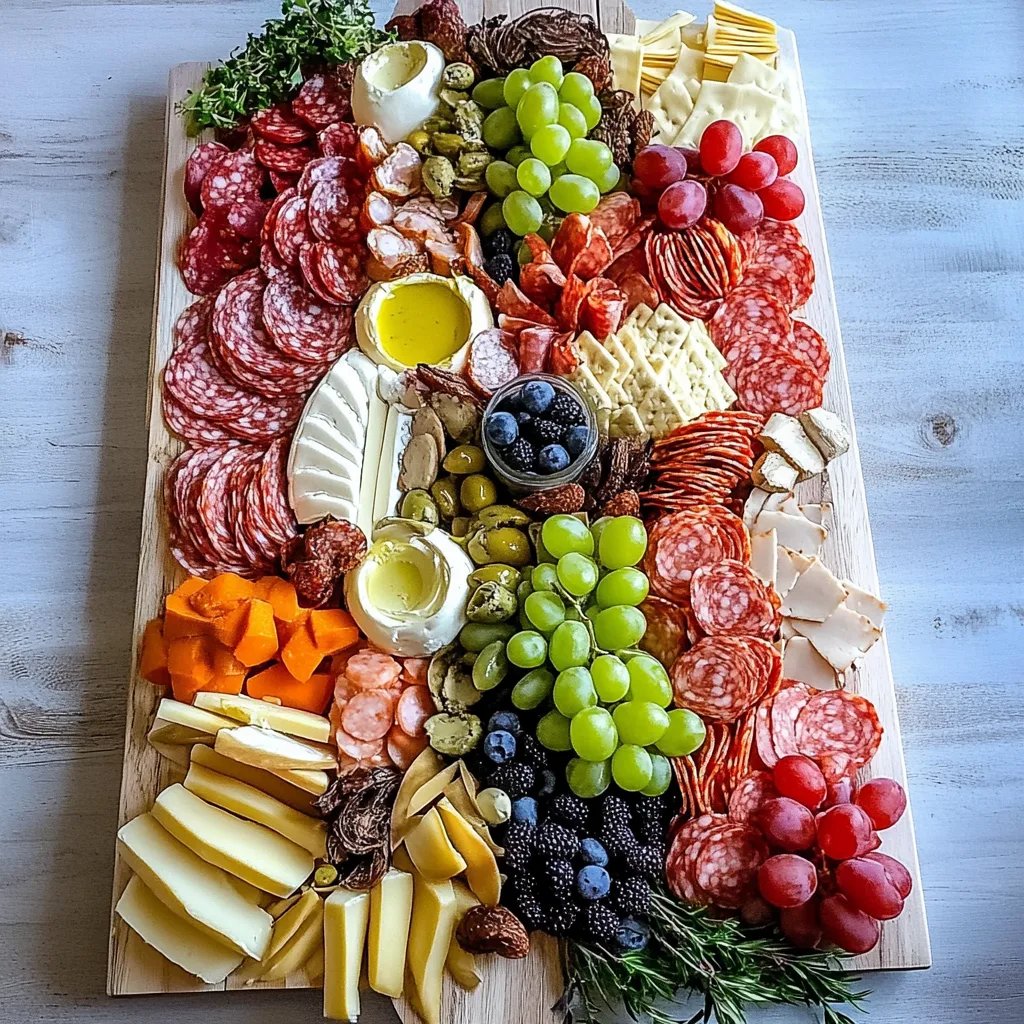
1. Visual Appeal: The vibrant colors of fruits, vegetables, meats, and cheeses create a feast for the eyes. A well-arranged board can instantly elevate your table setting.
2. Variety of Flavors: With countless combinations of sweet, savory, and tangy ingredients, there is something to satisfy every palate. Guests can mix and match their favorites, adding a bit of personalization to their experience.
3. Easy Preparation: Unlike traditional dishes that require cooking, assembling an Easter Charcuterie Board is simple and can be done in a short amount of time, freeing you up to enjoy your guests.
4. Perfect for Sharing: This communal style of eating promotes conversation and connection, making it ideal for gatherings where people can mingle and snack together.
5. Seasonal Inspiration: Use items that reflect the spring season, such as pastel-colored fruits or items shaped like Easter symbols, to infuse cheer into your gathering.
6. Flexible Serving Options: You can create a charcuterie board for brunch, lunch, or dinner. Tailor it to fit any meal or occasion with ease.
With these benefits in mind, you’ll appreciate the fun and flavor an Easter Charcuterie Board brings to your festivities.
Preparation and Cooking Time
Creating an Easter Charcuterie Board is quick and enjoyable. Here’s a straightforward breakdown of the time you’ll need:
– Preparation Time: 30 minutes
– Serving Time: Immediate after assembling (no cooking required)
– Total Time: Approximately 30 minutes
These times may vary depending on the complexity of your board and your ingredients, but it’s an excellent estimate to work with.
Ingredients
– Assorted cured meats (e.g., salami, prosciutto, and ham)
– Variety of cheeses (e.g., cheddar, brie, gouda, and goat cheese)
– Fresh fruits (e.g., strawberries, grapes, and sliced kiwi)
– Dried fruits (e.g., apricots, figs, and dates)
– Vegetables (e.g., baby carrots, radishes, and cherry tomatoes)
– Nuts (e.g., almonds, walnuts, and pecans)
– Various dips (e.g., hummus, olive tapenade, and mustard)
– Crackers and artisan bread
– Decorative elements (e.g., edible flowers, springs of herbs, or Easter-themed cutouts)
Step-by-Step Instructions
Assembling an Easter Charcuterie Board is a straightforward process when you follow these steps:
1. Choose Your Board: Select a large cutting board, platter, or a decorative serving tray as the base for your charcuterie.
2. Arrange the Cheeses: Start by placing your cheeses on the board. Cut some into wedges or cubes for easy serving.
3. Add Cured Meats: Artfully place the cured meats around the cheese. You can fold, roll, or drape them for visual appeal.
4. Incorporate Fresh Fruits: Scatter fresh fruits throughout the board. Use halved strawberries, whole grapes, and slices of kiwi to add color.
5. Include Dried Fruits: Add bowls or small clusters of dried fruits for sweet contrasts.
6. Vegetable Section: Create a vibrant veggie section with baby carrots, radishes, and cherry tomatoes arranged in a visually appealing way.
7. Fill with Nuts: Add small handfuls of various nuts in gaps to provide crunch and texture.
8. Dips and Spreads: Place small bowls filled with dips on the board, ensuring they are accessible from multiple angles.
9. Crackers and Bread: Fill any remaining spaces with an assortment of crackers and slices of bread. Stack or lay them neatly.
10. Finishing Touches: Decorate with edible flowers, fresh herbs, or fun Easter-themed cutouts, enhancing the festive feel.
With these steps, your Easter Charcuterie Board will come together beautifully, ready to delight your guests.
How to Serve
Serving an Easter Charcuterie Board can enhance the experience for your guests. Here are some tips to consider:
1. Presentation: Display the board at the center of the table, ensuring easy access from all sides. Elegantly arranged items increase visual appeal.
2. Utensils: Provide cheese knives for cutting, spoons for dips, and small plates for guests to serve themselves. Make sure everyone has what they need to enjoy the board.
3. Accompaniments: Consider adding a few refreshing beverages alongside your board. Sparkling water, fruit juices, or a selection of wines can complement the flavors nicely.
4. Encourage Interaction: Allow guests to build their own plates as they mix flavors and share stories. This communal style of dining creates a relaxed atmosphere.
5. Restock as Needed: Keep an eye on the board. If certain items are running low, refill them to ensure everyone has plenty of options.
By thoughtfully presenting and serving your Easter Charcuterie Board, you’ll enhance the overall dining experience, ensuring that everyone enjoys this delicious creation.
Additional Tips
– Use Seasonal Produce: Selecting fruits and vegetables that are in season can enhance flavor and presentation. Look for items that offer vibrant hues.
– Layer Flavors: Incorporate a variety of flavors by using different types of cheeses, meats, and spreads. This ensures each guest finds something they love.
– Create a Theme: To spice things up, consider a theme for your Easter Charcuterie Board. Think about colors, shapes, and even serveware that resonate with Easter traditions.
– Experiment with Spreads: Don’t be afraid to try different dips and spreads. Additionally, consider homemade options to elevate your charcuterie board.
– Eggs as a Centerpiece: Use colorful, decorated Easter eggs in the center of your board. They provide a delightful touch and symbolize the holiday.
Recipe Variation
You can personalize your Easter Charcuterie Board with several variations:
1. Mediterranean Twist: Incorporate hummus, stuffed grape leaves, and olives for a Mediterranean flair. Use pita bread instead of crackers for a unique twist.
2. Sweet and Savory Board: Add sweet components like chocolate-covered strawberries or honeycomb to contrast with savory items like prosciutto and aged cheese.
3. Vegetarian Option: Swap out cured meats for a variety of marinated vegetables, such as artichokes and roasted peppers. Include more plant-based dips, like avocado spread.
Freezing and Storage
– Storage: If you have leftovers, keep components in airtight containers. Vegetables and fruits can lose freshness quickly, so consume them within a day or two.
– Freezing: It’s best not to freeze an assembled charcuterie board due to the variety of ingredients. However, you can freeze individual components, like dips and certain cheeses, separately.
Special Equipment
No special tools are required for creating an Easter Charcuterie Board; however, a few items can make assembly easier:
– Large Cutting Board or Platter: Choose a board that is spacious enough to accommodate all ingredients.
– Small Serving Bowls: These come in handy for dips and smaller items like nuts.
– Cheese Knife: Useful for cutting and serving cheeses.
– Tongs or Skewers: Having these can help serve items like meats and vegetables.
– Decorative Utensils: Consider using themed utensils to enhance your Easter presentation.
Frequently Asked Questions
How can I prevent fruits from browning?
Use lemon juice on sliced apples or pears to slow down browning. Keeping fruits intact until time to serve also helps.
Can I make the board ahead of time?
You can prepare some components ahead, like dips and sliced cheeses, but it’s best to assemble the board just before serving for optimal freshness.
What if I have dietary restrictions among guests?
Offer a variety of choices, including gluten-free crackers, dairy-free cheese, and plant-based meats to accommodate all dietary needs.
How do I know how much food to prepare?
As a general rule, aim for around 2-3 ounces of meat and cheese per person, along with enough fruits, veggies, and crackers to fill the board.
Conclusion
An Easter Charcuterie Board is not only delicious but also adds a beautiful and interactive element to your spring celebration. From its colorful ingredients to its communal style of dining, it can bring joy and connection among your guests. Remember, the key is to mix and match flavors while being creative with your presentation. This guide offers all you need to create not just a meal, but an experience. Embrace the joy of this season and let your Easter Charcuterie Board shine at your gathering!