Fruit Charcuterie Board: An Incredible Ultimate Guide with 5 Tips
Fruit Charcuterie Boards have taken the culinary world by storm. These delightful arrangements combine nature’s most vibrant offerings, allowing you to indulge in color and flavor. The beauty of a Fruit Charcuterie Board lies not just in its presentation but also in its versatility. Whether for brunch, an afternoon snack, or a festive gathering, this board is sure to impress your guests. With a harmonious mix of textures and a variety of tasty fruits, you’ll find that creating this culinary masterpiece is both enjoyable and rewarding.
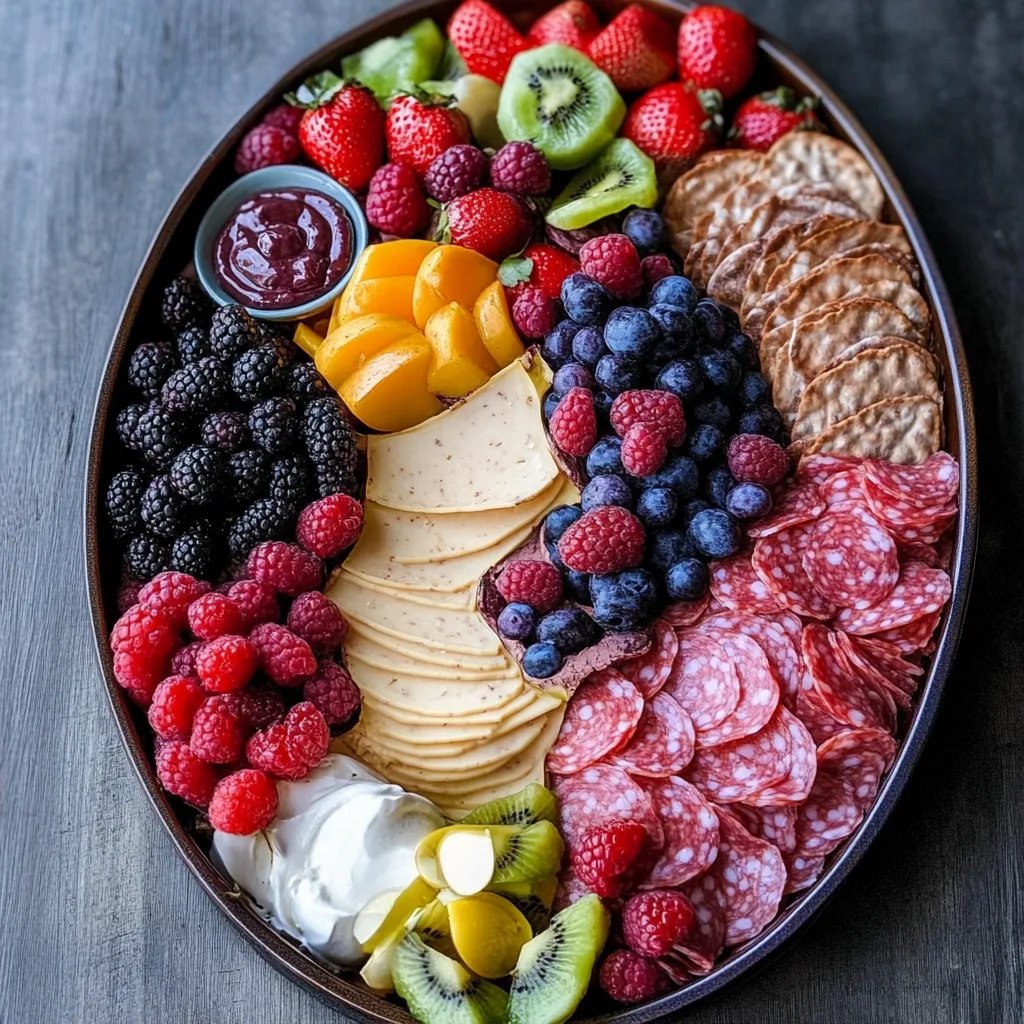
Imagine a table adorned with an array of fresh fruits, nuts, and perhaps even sweet dips. This aesthetic delight not only pleases the eye but also excites the palate. If you’ve ever savored a well-crafted fruit board, you know the joy of each bite bursting with sweet and tangy flavors. The Fruit Charcuterie Board goes beyond mere sustenance; it creates a social experience. As guests gather around, sharing stories and enjoying the beautiful arrangement, you’ll appreciate the art of food presentation.
In this guide, you will explore the reasons why a Fruit Charcuterie Board is an amazing addition to any gathering. You will learn about the preparation and cooking times, essential ingredients, step-by-step instructions, and tips for serving. Get ready to dive into the wonderful world of fruit, and craft a splendid board that could redefine your gatherings!
Why You’ll Love This Recipe
Creating a Fruit Charcuterie Board is a delightful way to celebrate fresh ingredients and creative presentation. You might wonder why this board is becoming essential at parties and casual meet-ups. Here are several reasons you’ll adore this recipe:
1. Endless Variety – You can choose an assortment of fruits based on the season, taste, and even dietary preferences.
2. Visually Stunning – A well-arranged board can serve as the centerpiece of any gathering.
3. Health-Conscious Option – Fresh fruit provides essential vitamins and nutrients, making this a guilt-free indulgence.
4. No Cooking Required – Simply arrange the ingredients on the board, saving you valuable kitchen time.
5. Interactive Experience – Guests can create their combinations, making it a fun activity for all ages.
6. Easy to Customize – You can add different dips, cheeses, nuts, or baked goods to match your theme or guest preferences.
These aspects contribute to why the Fruit Charcuterie Board is a must-have for anyone looking to impress their guests while keeping things fresh and healthy. Dive into this exciting culinary adventure, and you’ll find the art of food presentation can be just as rewarding as cooking itself!
Preparation and Cooking Time
Preparing your Fruit Charcuterie Board is surprisingly quick and easy. Here’s a breakdown of the time you’ll need to put this delightful board together:
– Preparation Time: 15 to 20 minutes
– No Cooking Required: This board involves no cooking, making it a simple yet effective option for entertaining.
The total time to create your board can vary slightly based on how quickly you chop and arrange the fruits, but you can easily whip it up in about 20 minutes!
Ingredients
– Assorted fresh fruits (e.g., strawberries, blueberries, grapes, kiwi, orange slices)
– Dried fruits (e.g., apricots, mango, figs)
– Nuts (e.g., almonds, walnuts, pecans)
– Cheese (optional: brie, goat cheese, or blue cheese)
– Honey or maple syrup (for drizzling)
– Fresh herbs (e.g., mint for garnish, optional)
– Edible flowers (optional for decoration)
Step-by-Step Instructions
Creating a visually appealing Fruit Charcuterie Board is straightforward. Follow these simple steps to make your own:
1. Select a Board: Start with a large wooden board, slate, or a platter to serve as your canvas.
2. Prepare the Fruits: Wash and dry the fresh fruits thoroughly. Slice larger fruits like kiwi, oranges, or strawberries for easier serving.
3. Arrange the Fruits: Begin by placing the larger fruit pieces on the board first. Think of balance and color when arranging them.
4. Fill in with Dried Fruits: Next, add dried fruits in between the fresh ones to create a more abundant look.
5. Add Nuts: Sprinkle nuts generously around the board for added texture and crunch.
6. Incorporate Cheese: If using cheese, slice or crumble it and scatter it across the board. This adds richness to the overall flavor.
7. Include Small Dishes: Add small bowls for honey or other dips, ensuring they’re easily accessible for guests.
8. Garnish: Finish by sprinkling fresh herbs like mint and edible flowers for a decorative touch.
9. Final Check: Step back and assess your arrangement. Adjust as needed to enhance visual appeal.
These simple steps will guide you in crafting an eye-catching and delicious Fruit Charcuterie Board that will blow your guests away!
How to Serve
Serving your Fruit Charcuterie Board can elevate the experience for your guests. Here are some tips for presentation and enjoyment:
1. Use a Large Serving Table: Position the board on a clean, flat surface to encourage guest interaction.
2. Include Serving Utensils: Provide toothpicks, small tongs, or spoons for easy serving.
3. Accompany with Beverages: Consider serving refreshing drinks like iced tea, sparkling water, or fruity cocktails that complement the fruits on your board.
4. Portion Sizes: Encourage guests to serve themselves, creating an opportunity for them to mix and match flavors.
5. Maintain Freshness: If the board is out for an extended time, consider refreshing the fruits or moving any that seem to wilt.
By considering these serving tips, you ensure that your guests not only enjoy the beautiful display but also appreciate the flavors and freshness of your Fruit Charcuterie Board. Enjoy the delightful combination of colors and tastes as you create a truly unforgettable culinary experience!
Additional Tips
– Choose Seasonal Fruits: Selecting fruits that are in season ensures maximum flavor and freshness. It also allows you to save on costs.
– Use a Variety of Colors: Incorporating fruits of various colors will make your board visually appealing and more appetizing.
– Don’t Overcrowd: Allow some space between different fruits. This helps create visual structure and prevents flavors from mingling too much.
– Experiment with Textures: Mix in crunchy nuts, creamy cheeses, and smooth dips to add dimension to your charcuterie board.
– Personalize with Labels: Consider labeling some fruits or dips to guide guests in their selections. This adds a thoughtful touch.
Recipe Variation
Here are some exciting variations to personalize your Fruit Charcuterie Board:
1. Dessert-Themed Board: Incorporate chocolate-dipped fruits, marshmallows, and crumbly cookies for a sweet twist.
2. Tropical Paradise: Use tropical fruits like mango, pineapple, and coconut to create a tropical theme that transports you to an island getaway.
3. Wine Pairing: Select fruits that pair well with your favorite wine, like berries with rosé or apples with a crisp white.
4. Breakfast Board: Add yogurt, granola, and nut butter for a morning-friendly version, making it suitable for brunch gatherings.
5. Savory Additions: Introduce savory elements such as cheese spreads or olives to balance the sweetness and create a more complex flavor profile.
Freezing and Storage
– Storage: Keep any leftover fruits in airtight containers in the refrigerator. Most fruits last for 3-5 days when stored properly.
– Freezing: While it’s best to prepare your Fruit Charcuterie Board fresh, you can freeze certain fruits like berries. Make sure they are washed and dried before freezing, and consume within 6 months for the best quality.
Special Equipment
To effortlessly create your Fruit Charcuterie Board, you may need some basic tools:
– Large cutting board or platter for arranging the fruits
– Sharp knife for slicing
– Small bowls for dips or additional toppings
– Decorative items like garnishes or serving utensils
– Non-perishable items like nuts that can be stored longer without issues
Frequently Asked Questions
What fruits work best for a charcuterie board?
Fruits like berries, grapes, melons, and citrus fruits are great options. Ensure to choose a mix for texture and flavor.
How far in advance can I prepare my board?
You can prepare the components a day in advance but assemble the board just before serving to maintain freshness.
Can I make a Fruit Charcuterie Board vegan?
Absolutely! Stick to fruits, nuts, and plant-based dips to keep it completely vegan-friendly.
What if my fruits get brown?
To prevent browning, you can use a light mixture of lemon juice and water to coat cut fruits before arranging them on the board.
Can I include dried fruits?
Yes, dried fruits are a great addition! They offer a chewy texture and an alternate flavor profile that pairs well with fresh fruits.
Conclusion
Crafting a Fruit Charcuterie Board is not just a delicious experience; it’s also a feast for the eyes and a delightful activity for your guests. The combination of seasonal fruits, nuts, and optional cheeses creates a satisfying array of flavors and textures. By incorporating various colors and ingredients, you can ensure it’s a stunning centerpiece for any occasion. Remember to prepare carefully, serve creatively, and most importantly, enjoy the wonderful social interactions that this board inspires!