Grilled Fall-Off-The-Bone Ribs: An Amazing Ultimate Recipe
Grilled Fall-Off-The-Bone Ribs are the ultimate delight for barbecue lovers everywhere. Nothing beats the satisfying experience of biting into a tender rib that simply falls apart with the slightest tug. This incredible recipe brings together the perfect combination of spices, cooking techniques, and time, transforming a standard cut of meat into something truly special.
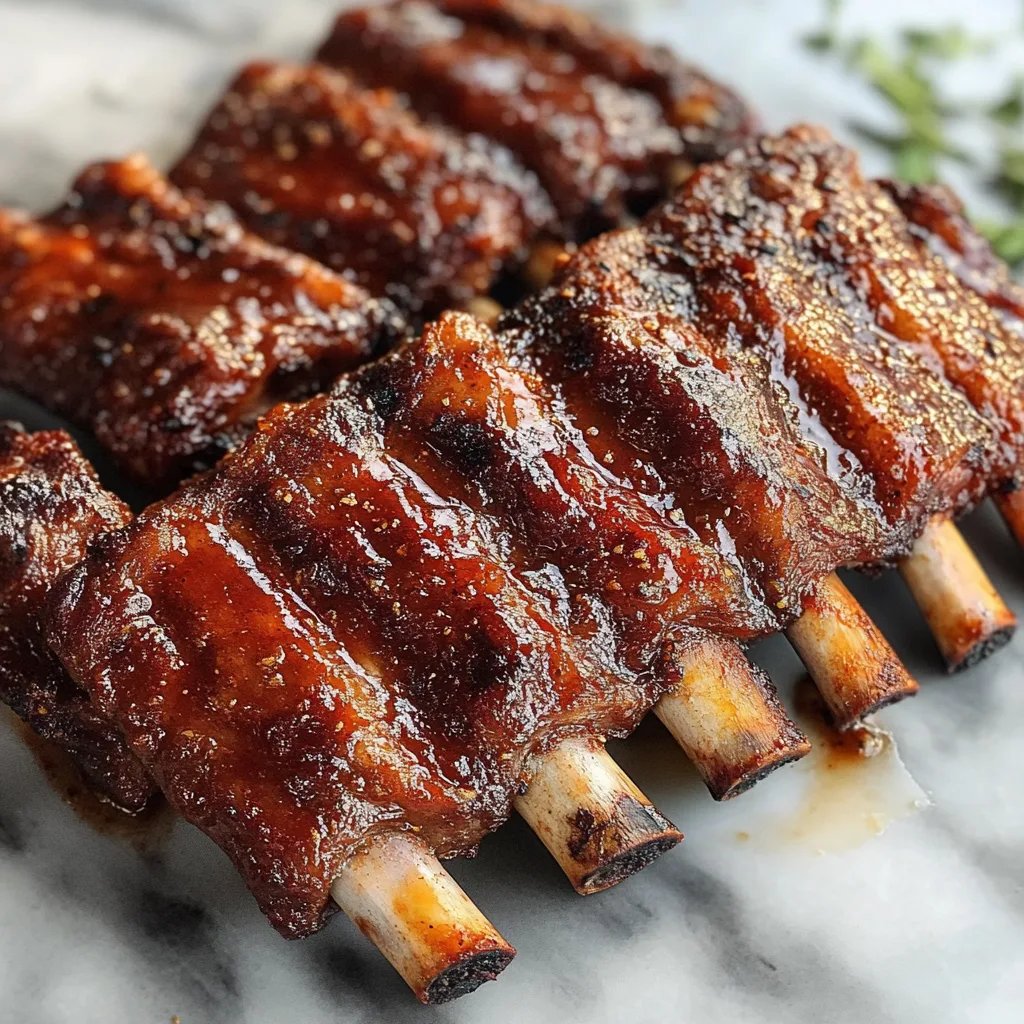
Imagine juicy, flavorful ribs slathered with a rich sauce, cooking slowly on your grill until they become perfectly tender. Each bite reveals a delicious blend of flavors that leaves you craving more. This dish is perfect for gatherings, family barbecues, or simply when you want to indulge in a hearty meal. In this guide, we’ll walk you through every step of creating these mouthwatering ribs that will leave your guests raving.
Whether you’re a seasoned pitmaster or a novice in the kitchen, this recipe is designed for anyone to achieve those incredible, fall-off-the-bone results. You will learn not only about the ingredients and equipment needed but also tips for serving and enjoying these delicious ribs. With this recipe, it’s never been easier to impress your friends and family with mouthwatering grilled ribs that they won’t forget!
Why You’ll Love This Recipe
Grilled Fall-Off-The-Bone Ribs offer so much to love. Here are a few standout reasons why this recipe is a must-try:
1. Unbeatable Flavor: The combination of spices in the dry rub enhances the natural taste of the ribs, creating a burst of flavor in every bite.
2. Tender Textures: Thanks to low-and-slow cooking, the ribs become incredibly tender, practically falling off the bone.
3. Simple Cooking Method: Even if you’re new to grilling, following this straightforward recipe will yield delicious results.
4. Versatile Sauce Options: Whether you prefer a tangy barbecue sauce or something sweeter, you can customize the glaze to your liking.
5. Perfect for Any Occasion: These ribs are well-suited for summer barbecues, tailgates, or cozy family dinners.
6. Impressive Presentation: A platter of beautifully grilled ribs will impress any guest and elevate your hosting game.
These ribs are more than just a meal; they are an experience that brings everyone together. With flavors and textures that delight, you’ll understand why this recipe is a favorite at cookouts and social gatherings alike.
Preparation and Cooking Time
Taking the time to prepare Grilled Fall-Off-The-Bone Ribs is worth every minute. Here’s how the time breaks down:
– Preparation Time: 20-30 minutes
– Marinating Time: 2-24 hours (the longer, the better!)
– Cooking Time: 3-4 hours on the grill
– Resting Time: 10-15 minutes
Overall, you can plan for at least 4 hours from start to finish, including the marination time. Properly marinating the ribs enhances the flavor and tenderness, ensuring that every bite is succulent and delicious.
Ingredients
– 2 racks of baby back ribs
– 2 tablespoons olive oil
– 1 tablespoon paprika
– 1 tablespoon brown sugar
– 1 tablespoon garlic powder
– 1 tablespoon onion powder
– 1 teaspoon cayenne pepper (optional)
– 1 tablespoon salt
– 1 tablespoon black pepper
– 1 cup barbecue sauce (your choice)
– 1 tablespoon apple cider vinegar (optional, for tanginess)
Step-by-Step Instructions
Creating the perfect Grilled Fall-Off-The-Bone Ribs can be simple when you follow these steps:
1. Prepare the Ribs: Remove the silver skin from the back of the ribs for better texture and flavor absorption.
2. Apply Olive Oil: Rub the ribs with olive oil to help the seasoning stick.
3. Make the Dry Rub: In a small bowl, mix paprika, brown sugar, garlic powder, onion powder, cayenne pepper, salt, and black pepper.
4. Rub the Ribs: Generously coat both sides of the ribs with the dry rub. Press it in to ensure it adheres well.
5. Marinate: Wrap the ribs in plastic wrap and refrigerate for at least 2 hours, preferably overnight for maximum flavor.
6. Preheat the Grill: Heat your grill to a low temperature (around 225°F to 250°F).
7. Place Ribs on the Grill: Position the ribs bone-side down on the grill. Close the lid.
8. Cook Slowly: Let the ribs cook for 3-4 hours, maintaining a steady, low temperature. Optionally, baste with apple cider vinegar for moisture.
9. Add Sauce: During the last 30 minutes, brush the ribs with your favorite barbecue sauce and close the lid.
10. Check for Tenderness: The ribs are done when the meat is tender and pulls away easily from the bone.
11. Remove from Grill: Carefully take the ribs off the grill and let them rest for 10-15 minutes.
12. Slice and Serve: Cut the ribs between the bones and arrange them on a serving platter.
These simple yet effective steps guarantee deliciously tender ribs that everyone will enjoy.
How to Serve
Serving Grilled Fall-Off-The-Bone Ribs is as fun as making them. Here’s how you can present them beautifully:
1. Plating: Arrange the ribs on a large platter, slightly overlapping for an appealing visual.
2. Garnish with Fresh Herbs: Sprinkle chopped parsley or cilantro over the top for a splash of color and freshness.
3. Accompaniments: Serve alongside classic sides such as coleslaw, baked beans, or cornbread to enhance the meal.
4. Extra Sauce: Offer additional barbecue sauce on the side for those who love a little extra flavor.
5. Beverage Pairings: Consider serving with cold beers, iced tea, or lemonade to complement the flavors of the ribs.
6. Attractively Cut: Use a sharp knife to slice the ribs neatly, making it easy for guests to serve themselves.
By taking these steps, you can create an inviting and delicious barbecue experience that your friends and family will love. Enjoy every bite of your Grilled Fall-Off-The-Bone Ribs!
Additional Tips
– Patience is Key: The secret to fall-off-the-bone tenderness is low and slow cooking. Avoid the temptation to increase the heat.
– Baste Regularly: For flavorful ribs, baste with apple cider vinegar or additional sauce every hour while cooking.
– Use a Meat Thermometer: To ensure optimal doneness and prevent overcooking, use a meat thermometer. Ribs are usually perfect when they reach an internal temperature of 190°F to 203°F.
– Experiment with Dry Rubs: While our blend is delicious, you can customize your dry rub by experimenting with other spices or even adding coffee grounds for a unique depth of flavor.
– Resting is Important: Allowing the ribs to rest after cooking helps redistribute the juices, enhancing tenderness and flavor.
Recipe Variation
There are many ways to mix things up with this fantastic recipe. Here are some variations to consider:
1. Spicy BBQ Ribs: Add more cayenne pepper or some diced jalapeños to the dry rub for a kick of heat.
2. Sweet and Tangy Ribs: Incorporate honey or apple syrup into the barbecue sauce for a sweeter glaze.
3. Asian-Inspired Ribs: Substitute the dry rub with a mix of soy sauce, ginger, and sesame for a different flavor profile.
4. Smoked Ribs: For an extra smoky flavor, add wood chips to your grill or smoker during the cooking process.
5. Herbed Ribs: Add dried herbs like thyme or oregano to the dry rub for an aromatic twist.
Freezing and Storage
– Refrigeration: Leftover ribs can be stored in an airtight container in the refrigerator for up to 4 days.
– Freezing: To freeze, wrap individual portions tightly in plastic wrap and then in aluminum foil or freezer bags. They can be frozen for up to 3 months.
– Reheating: When ready to enjoy leftover ribs, reheat them gently in the oven at 250°F until warmed through, adding a little moisture with barbecue sauce to keep them tender.
Special Equipment
To achieve the best results while preparing Grilled Fall-Off-The-Bone Ribs, consider these essential tools:
– Grill: A charcoal or gas grill will work, but a smoker is ideal for an added smoky flavor.
– Meat Thermometer: For accurately checking the internal temperature of the ribs.
– Basting Brush: For applying sauces or marinades during cooking.
– Aluminum Foil: To wrap the ribs if using the Texas Crutch method for extra tenderness.
– Tongs: Long-handled tongs are necessary for handling hot ribs.
Frequently Asked Questions
How do I know when the ribs are ready?
Check for tenderness; the meat should pull away from the bones easily, and a meat thermometer should read between 190°F and 203°F.
Can I cook these ribs in the oven instead?
Yes! You can bake them in the oven at 275°F for approximately 3-4 hours, covered in foil for tenderness, then finish on the grill to caramelize the sauce.
Can I use spare ribs instead of baby back ribs?
Absolutely! Spare ribs have more fat and flavor and can also produce delicious results.
Is it necessary to marinate the ribs overnight?
While it enhances the flavor, it is not strictly necessary. Even a few hours of marination can significantly improve the taste.
Can I make the dry rub in advance?
Yes! The dry rub can be prepared ahead of time and stored in an airtight container for several months.
Conclusion
Grilled Fall-Off-The-Bone Ribs are truly a culinary delight that brings flavor, tenderness, and joy to any gathering. Whether you’re celebrating a special occasion or enjoying a casual weekend cookout, this recipe is sure to impress. Follow the steps carefully, and with a bit of patience, you will create ribs that are not just food but a memorable experience shared with family and friends. Come for the flavor, stay for the tenderness!