Mini Biscoff Cheesecakes: The Incredible Ultimate Recipe You Can’t Resist
Mini Biscoff Cheesecakes are an amazing treat that will leave your taste buds in awe. If you are a fan of creamy cheesecakes combined with the delightful spices and flavors of Biscoff cookies, you’re in for a deliciously satisfying dessert experience! These mini cheesecakes offer the perfect balance of creamy texture and crunchy crust, evoking sweet memories of indulgence without the guilt of overdoing it with a giant slice. What’s great about these mini delights is that they are perfect for sharing, making them an ideal dessert for parties, gatherings, or simply to enjoy with your loved ones on a cozy evening.
Have you ever found yourself craving something sweet but don’t want to dive into a hefty cake? Mini Biscoff Cheesecakes are the answer to your cravings! Easy to make and fun to eat, these little gems are packed with flavor and are visually appealing to boot. In this article, we’ll guide you through everything you need to know to create these delectable treats, from preparation time to cooking instructions.
With their luscious filling and delectable crust, these mini cheesecakes are bound to become a favorite in your dessert repertoire. So, let’s dive into why you’ll love this recipe and how to master it at home!
Why You’ll Love This Recipe
There are countless reasons to adore Mini Biscoff Cheesecakes! Here’s a look at some standout features that make this dessert irresistible:
1. Quick and Easy: This recipe doesn’t require advanced baking skills, making it perfect for beginners.
2. Perfect Portion Control: Mini cheesecakes provide just the right amount of sweetness without leading to overindulgence.
3. Decadent Flavor: The unique taste of Biscoff cookies combined with creamy cheesecake creates a delightful flavor profile.
4. Versatile Options: You can easily adapt the recipe to suit different tastes, like adding chocolate or drizzling caramel sauce on top.
5. Beautiful Presentation: The individual servings are visually stunning, making them an impressive addition to any dessert table.
6. Great for Any Occasion: Birthdays, holidays, or casual get-togethers—these mini cheesecakes fit every occasion!
With all these amazing attributes, it’s clear that Mini Biscoff Cheesecakes are a must-try dessert that everyone will love!
Preparation and Cooking Time
Creating your Mini Biscoff Cheesecakes will take a total of about 1 hour and 15 minutes, which includes the preparation and chilling time. Here’s a breakdown of the time you’ll need:
– Preparation Time: 30 minutes
– Cooking Time: 25-30 minutes
– Chilling Time: 30-60 minutes
These durations may slightly vary depending on your kitchen equipment and skill level. However, this estimate provides a good framework to follow.
Ingredients
– 1 ½ cups Biscoff cookie crumbs
– ½ cup unsalted butter, melted
– 16 oz cream cheese, softened
– ½ cup granulated sugar
– 1 tsp vanilla extract
– 2 large eggs
– ½ cup sour cream
– 1 tsp ground cinnamon
– Additional Biscoff cookies for topping (optional)
Step-by-Step Instructions
Making Mini Biscoff Cheesecakes is simple if you follow these straightforward steps:
1. Preheat the Oven: Preheat your oven to 325°F (160°C).
2. Prepare the Crust: In a medium bowl, combine Biscoff cookie crumbs and melted butter. Stir until the crumbs are evenly moistened.
3. Line the Muffin Pan: Line a muffin tin with paper cupcake liners. Spoon about 1 tablespoon of the crust mixture into each muffin liner. Press down firmly to form an even layer.
4. Mix the Cheesecake Filling: In a large bowl, beat the softened cream cheese and granulated sugar until smooth and creamy. Add in the vanilla extract and mix again.
5. Incorporate Eggs and Sour Cream: Gradually add the eggs, one at a time, mixing well after each addition. Finally, fold in the sour cream and ground cinnamon until fully combined.
6. Fill the Muffin Tins: Carefully pour the cheesecake filling over the crust evenly, filling each muffin cup to about ¾ full.
7. Bake: Place the muffin tin in the preheated oven and bake for 25-30 minutes, or until the cheesecakes are set around the edges but slightly jiggly in the center.
8. Cool the Cheesecakes: Remove the cheesecakes from the oven and let them cool at room temperature for 10 minutes.
9. Chill: Transfer the muffin tin to the refrigerator and allow the cheesecakes to chill for a minimum of 30-60 minutes.
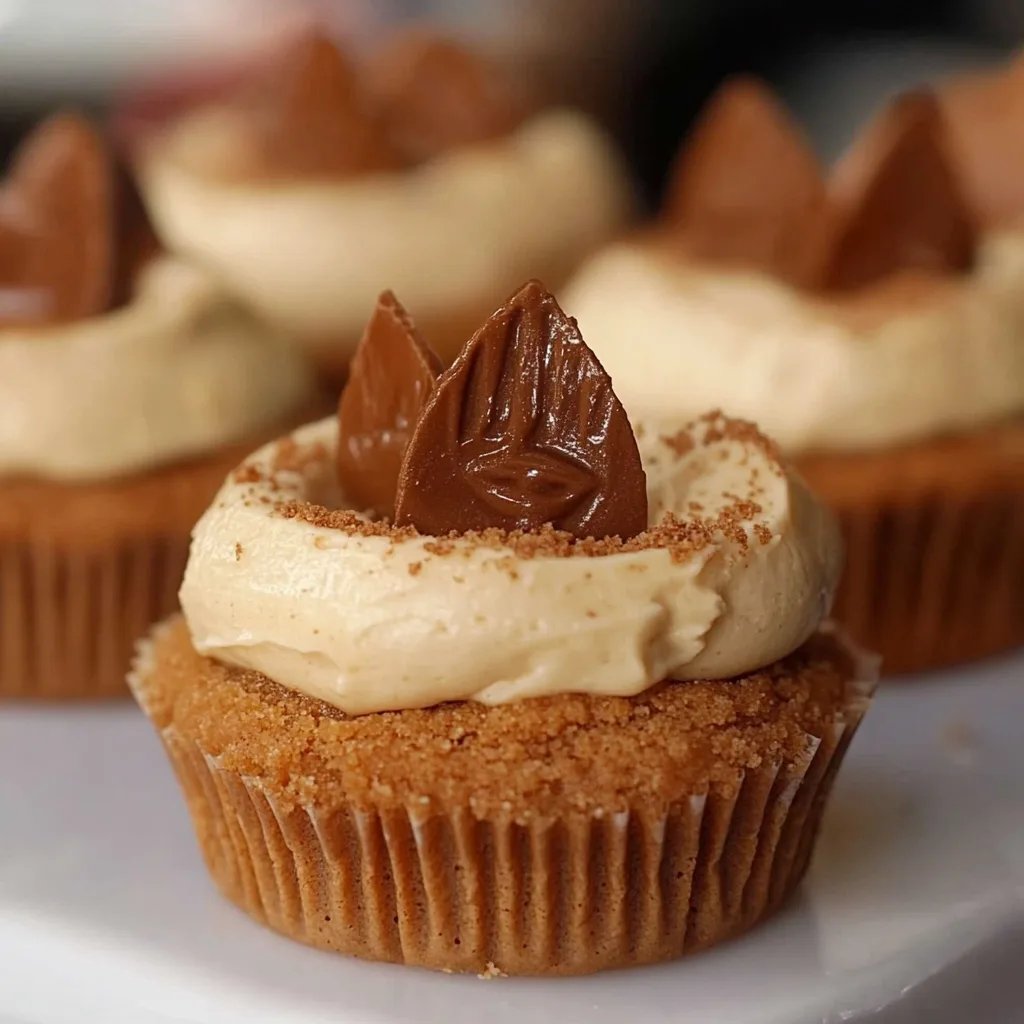
10. Serve: Once chilled, remove the mini cheesecakes from the muffin tin. Top with additional Biscoff cookies if desired for garnish.
With these simple steps, you’ll have perfected a batch of Mini Biscoff Cheesecakes that are sure to impress!
How to Serve
Serving Mini Biscoff Cheesecakes is all about presentation and enhancing the flavors. Here are some delightful ideas to elevate your dessert experience:
1. Elegant Display: Arrange your mini cheesecakes on a decorative platter or tiered cake stand for an eye-catching presentation.
2. Accompaniments: Pair with fresh fruit, whipped cream, or a drizzle of caramel or chocolate sauce for added decadence.
3. Garnish: Enhance visual appeal by adding crushed Biscoff cookies or a sprig of mint on top of each cheesecake.
4. Beverage Pairing: Complement your dessert with a cup of rich coffee or a sweet dessert wine to elevate the flavors.
5. Serving Temperature: Serve chilled for the best texture and flavor; this also helps manage portion control.
By focusing on presentation and thoughtful servings, your Mini Biscoff Cheesecakes will become the star of any gathering!
Additional Tips
– Use Room Temperature Ingredients: For the best texture, ensure your cream cheese is at room temperature before mixing. This will help prevent lumps.
– Customize Toppings: Aside from Biscoff cookies, consider adding fresh berries or a drizzle of chocolate to enhance flavor and presentation.
– Avoid Overmixing: When adding the eggs, mix just until combined to maintain a light and fluffy texture in your cheesecakes.
– Cool Gradually: Let the cheesecakes cool at room temperature before chilling, as this helps prevent cracks.
Recipe Variation
Feel free to get creative! Here are some fun variations to try:
1. Chocolate Biscoff Cheesecakes: Add melted chocolate to the cream cheese mixture for a richer flavor.
2. Pumpkin Spiced Biscoff Cheesecakes: Incorporate pumpkin puree and pumpkin spice for a festive autumn twist.
3. Nutty Biscoff Cheesecakes: Fold in finely chopped nuts, like pecans or hazelnuts, into the cheesecake mixture for added crunch.
4. Fruit-Filled Cheesecakes: Add a layer of fruit preserves or fresh fruit in the middle for a refreshing burst of flavor.
Freezing and Storage
– Storage: Keep the Mini Biscoff Cheesecakes covered in the refrigerator. They are best enjoyed within 4-5 days.
– Freezing: These cheesecakes can be frozen for up to 3 months. Prior to freezing, wrap them tightly in plastic wrap and then in aluminum foil to prevent freezer burn.
Special Equipment
To make your baking experience smooth, ensure you have the following tools:
– Muffin Tin: Essential for holding your mini cheesecakes in shape.
– Mixing Bowls: At least two bowls for mixing the crust and filling.
– Hand Mixer or Stand Mixer: Useful for achieving a smooth cheesecake filling.
– Rubber Spatula: Perfect for scraping down the sides of bowls and folding ingredients gently.
Frequently Asked Questions
Can I use regular cookies instead of Biscoff?
Yes, you can substitute with another type of cookie, but flavor profiles may vary.
How can I tell when the mini cheesecakes are done?
They should be set around the edges and slightly jiggly in the center when done baking.
Can I make these gluten-free?
Absolutely! Substitute Biscoff cookies with gluten-free cookies or use gluten-free graham cracker crumbs for the crust.
How long do Mini Biscoff Cheesecakes last?
They will ordinarily last about 4-5 days in the fridge and can be frozen for up to 3 months.
Conclusion
Mini Biscoff Cheesecakes are not only delicious but also easy to make and perfect for any gathering. Their creamy texture combined with the crunch of the Biscoff cookie crust makes them an irresistible treat. Whether enjoyed as a personal indulgence or shared with friends and family, these mini treasures are sure to delight. With this recipe in hand, you’ll be well on your way to impressing everyone with a dessert that’s both beautiful and scrumptious.