Simple Charcuterie Boards: An Incredible Ultimate Guide with 5 Tips
Simple charcuterie boards are a delightful way to impress guests at any gathering. The artistry of arranging delicious meats, cheeses, and accompaniments captures the essence of social dining. Creating a stunning charcuterie board allows you to showcase your ingredients creatively, making it a centerpiece of conversation and enjoyment. Whether you’re hosting a dinner party, a casual get-together, or simply indulging for yourself, mastering the art of charcuterie can elevate your culinary skills to a new level.
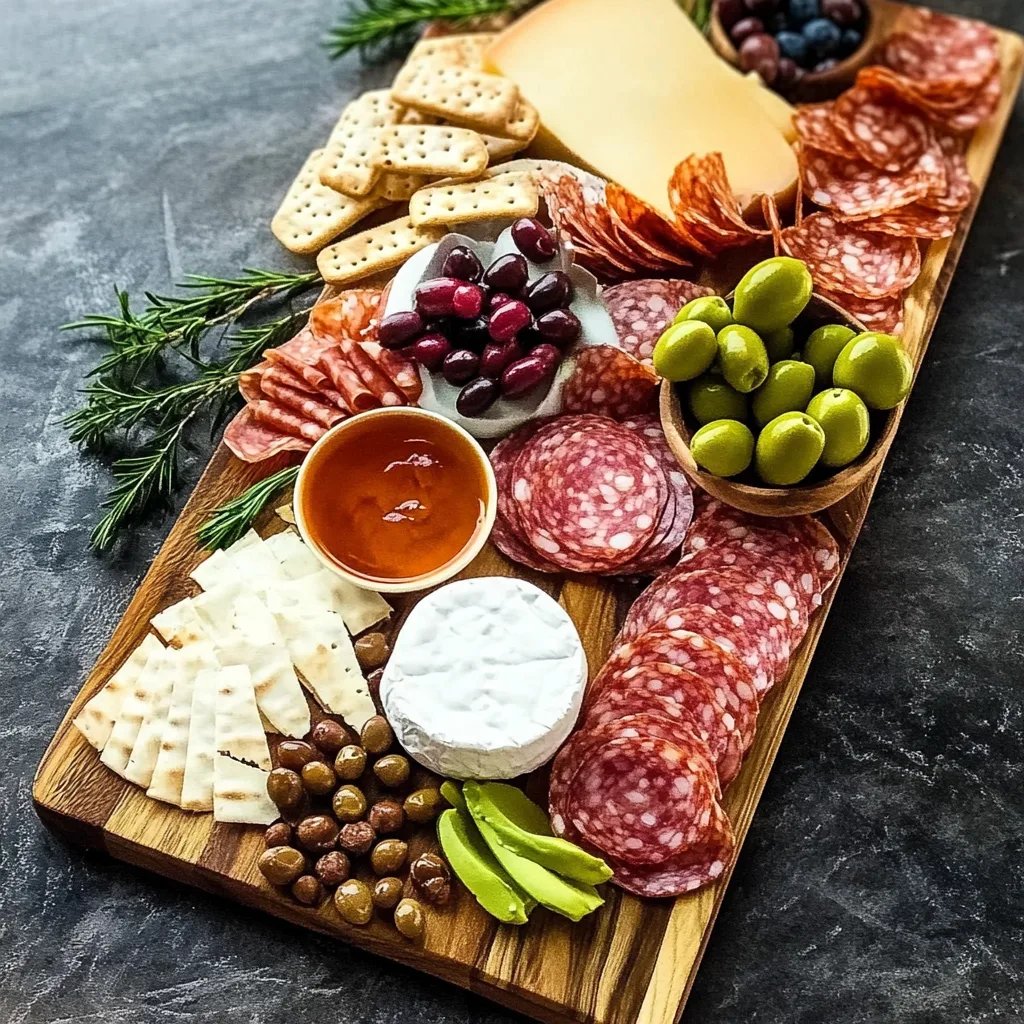
Imagine guests approaching a beautifully laid-out board filled with vibrant colors and enticing aromas. The sensory experience begins the moment they catch sight of the array of options available. From savory meats to creamy cheeses, and picking the right nuts and fruits, each element on your simple charcuterie board enhances the deliciousness of the others. The fun lies in the mix of flavors and textures that come together to create a unique eating experience.
In this guide, we will explore why simple charcuterie boards should be your go-to entertaining option. Additionally, we’ll cover preparation and essential ingredients to help you build an amazing board with ease. The beauty of these boards is in their simplicity and versatility, allowing for limitless creativity. Let’s dive into what makes simple charcuterie boards such a wonderful choice for any occasion.
Why You’ll Love This Recipe
Creating simple charcuterie boards is not just about arranging food; it’s an experience that fosters connection and creativity. Here are several reasons why this concept should be a staple in your culinary arsenal:
1. Endless Customization – You can tailor your board to suit any dietary preference, whether your guests are meat-lovers, vegetarians, or gluten-free.
2. Quick Preparation – Unlike many elaborate recipes, charcuterie boards are straightforward to assemble. This leaves you more time to enjoy with your guests.
3. Visual Appeal – The vibrant colors and diversity of textures make for a stunning presentation, enhancing your table setting.
4. Shareable Experience – Charcuterie boards are meant for sharing, making them perfect for social events and gatherings.
5. Simple Ingredients – Most of the required ingredients are easy to find and can be adjusted based on availability and preferences.
Each of these factors contributes to the widespread love for simple charcuterie boards. When served at parties or casual get-togethers, these boards facilitate conversation and engagement, making everyone feel at ease.
Preparation and Cooking Time
Creating simple charcuterie boards requires minimal time and effort. Here’s a breakdown of the time involved:
– Preparation Time: 15-20 minutes
– Assembly Time: 10 minutes
Totaling around 30 minutes, making a charcuterie board is quick and efficient. You can spend that extra time preparing a beverage or ensuring your guests are comfortable.
Ingredients
– Assorted cured meats (e.g., salami, prosciutto, chorizo)
– Variety of cheeses (e.g., brie, cheddar, goat cheese)
– Fresh fruits (e.g., grapes, figs, apple slices)
– Nuts (e.g., almonds, walnuts, pistachios)
– Dried fruits (e.g., apricots, cranberries)
– Crackers or bread (e.g., baguette slices, breadsticks)
– Condiments (e.g., mustard, honey, olives)
– Fresh herbs (for garnish, optional)
Step-by-Step Instructions
Follow these steps to create your simple charcuterie board:
1. Choose Your Board: Select a large wooden board, slate, or a platter that will be the canvas for your creation.
2. Plan the Layout: Visualize the arrangement before you start placing items, ensuring balance with colors and textures.
3. Arrange the Cheese: Begin by placing your cheese on the board, spacing them evenly. Consider using cheese markers for identification.
4. Add the Meats: Arrange cured meats around the cheeses. You can fold or roll them for visual appeal.
5. Incorporate Dried Fruits and Nuts: Fill in gaps with dried fruits and nuts. This’ll add texture and color to the board.
6. Include Fresh Fruits: Tuck in fresh fruits like grapes or apple slices for a juicy contrast to the salty meats and rich cheeses.
7. Scatter Crackers and Bread: Place crackers or slices of bread around the board for dipping and spreading.
8. Add Condiments: Include small bowls for condiments, such as honey or mustard. This allows guests to personalize their servings.
9. Garnish: If desired, add fresh herbs for a touch of freshness and aesthetics.
10. Serve: Present your charcuterie board to your guests, encouraging them to explore the array of flavors.
How to Serve
When serving your simple charcuterie board, here are several tips to enhance the experience:
1. Presentation Is Key: Ensure your board is visually appealing. Use a variety of shapes and colors for a more engaging display.
2. Pairings: Suggest beverage pairings, such as wine or craft beer, to complement the flavors on the board.
3. Utensils: Provide cheese knives and small forks or spoons for easy serving of condiments and spreads.
4. Encourage Sharing: Remind guests to mix and match! Encouraging creativity in combinations can lead to exciting discoveries of taste.
5. Timing: Allow the board to sit out a bit before guests arrive to let the cheeses come to room temperature, enhancing flavor and aroma.
Whether for an upscale event or a casual night in, simple charcuterie boards can create lasting impressions that bring delightful flavors to the forefront. With ease and creativity, you can make fun gatherings around good food a regular occurrence in your life.
Additional Tips
– Use Fresh Ingredients: When creating simple charcuterie boards, opt for the freshest ingredients available for the best taste. Seasonal fruits and freshly sliced meats elevate flavor.
– Balance Flavors: Ensure a mix of flavors, balancing salty, sweet, and tangy items. This adds complexity and keeps guests engaged.
– Include Textural Variety: Incorporate crunchy, creamy, and chewy items to make your board more appealing. Guests enjoy a variety of textures on their plates.
– Theme Your Board: Consider creating themed boards, such as Mediterranean or brunch-inspired. This adds an element of creativity and can guide your ingredient selection.
– Experiment with Presentation: Don’t be afraid to try different shapes and heights when arranging your items. Stack cheese, fan out meats, or use jars for condiments to add dimension.
Recipe Variation
Feel free to customize your simple charcuterie board! Here are some variations to consider:
1. Seasonal Board: Adapt your ingredients according to the seasons. In summer, include vibrant berries; during fall, feature apples and spiced fruits.
2. International Flavors: Explore flavors from around the world using international meats (like Italian salami or Spanish chorizo) and cheeses (like French brie or Swiss).
3. Plant-Based Board: For vegans and plant-based eaters, swap meats for varieties of smoked tofu, and cheeses for nut-based cheeses. Add more fruits and veggies for crunch and color.
4. Sweet Charcuterie: Create a dessert board featuring chocolates, cookies, dried fruits, and a selection of fresh fruits paired with sweet dips like caramel or chocolate sauce.
5. Breakfast Board: Construct a breakfast charcuterie board with items such as mini muffins, yogurt, granola, fruits, and breakfast meats like bacon or sausage.
Freezing and Storage
– Storage: Simple charcuterie boards are best served fresh. However, if you have leftovers, you can store meats and cheeses in airtight containers in the refrigerator for up to 3 days.
– Preparation Ahead: You can pre-cut your cheeses, meats, and fruits the day before to save time. Just keep them in the refrigerator until assembly.
Special Equipment
While you don’t need much to create a charcuterie board, some tools can enhance your experience:
– Cutting Board or Platter: Choose a sturdy wooden board or a decorative platter as your base.
– Cheese Knives: Have a few different knives for slicing various cheese types.
– Small Bowls: Use them to hold spreads and dips, ensuring ease of access for guests.
– Tongs or Spoons: These ensure guests can serve themselves without the need for extra utensils.
– Cheese Markers: Optional, but nice for identifying different cheeses for your guests.
Frequently Asked Questions
How long can I keep my charcuterie board out at room temperature?
It’s best to have your board out for no longer than 2 hours to prevent spoilage, especially in warm conditions.
Can I customize my ingredients based on dietary restrictions?
Absolutely! You can cater the board to suit dietary restrictions by including gluten-free crackers, vegan cheeses, or nuts for those who avoid dairy.
What if I don’t have certain ingredients?
No problem! Substitute any ingredient with what you have available. The versatility of simple charcuterie boards is one of their best features.
How do I transport my charcuterie board if I’m going to a gathering?
To transport your simple charcuterie board, assemble it in a container with a lid or cover it securely with plastic wrap. Alternatively, you can pack ingredients separately and assemble them at the location.
Can I prepare the board the night before?
You can prepare components the night before, but it’s best to assemble the board a few hours before serving for optimal freshness and presentation.
Conclusion
Simple charcuterie boards are an excellent addition to any entertaining repertoire. With their vibrant colors and endless customization options, they provide an impressive yet straightforward way to delight your guests. By considering flavor, texture, and presentation, you can create boards that encourage interaction and enjoyment. Whether it’s for a special occasion or a casual gathering, perfecting the art of simple charcuterie boards is sure to enhance your culinary experiences.